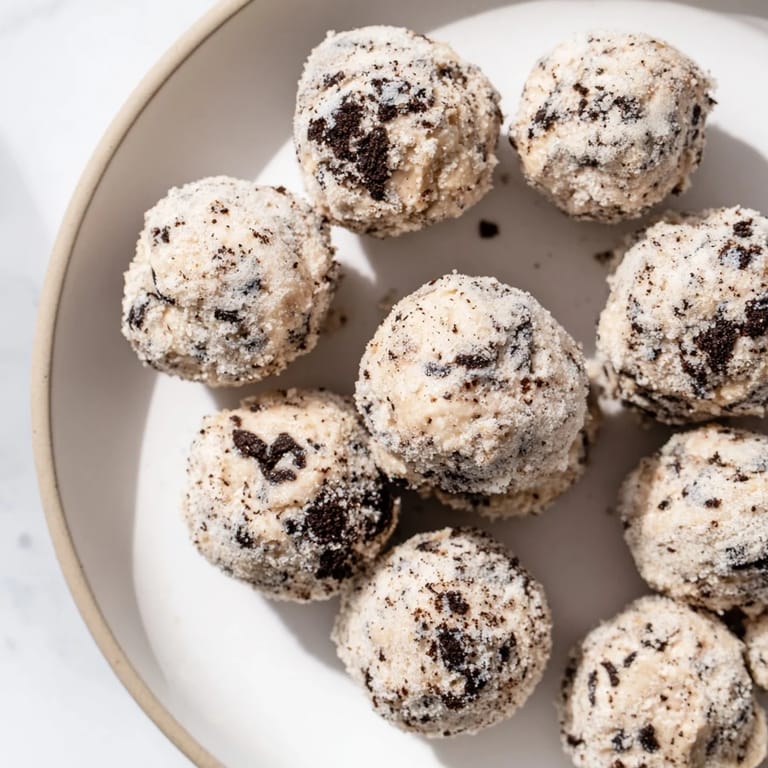
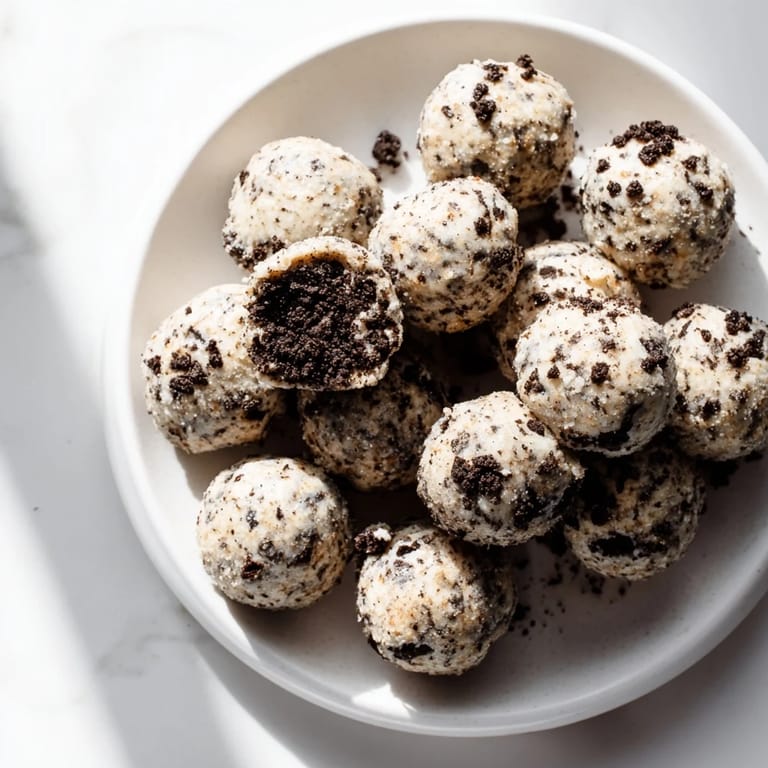
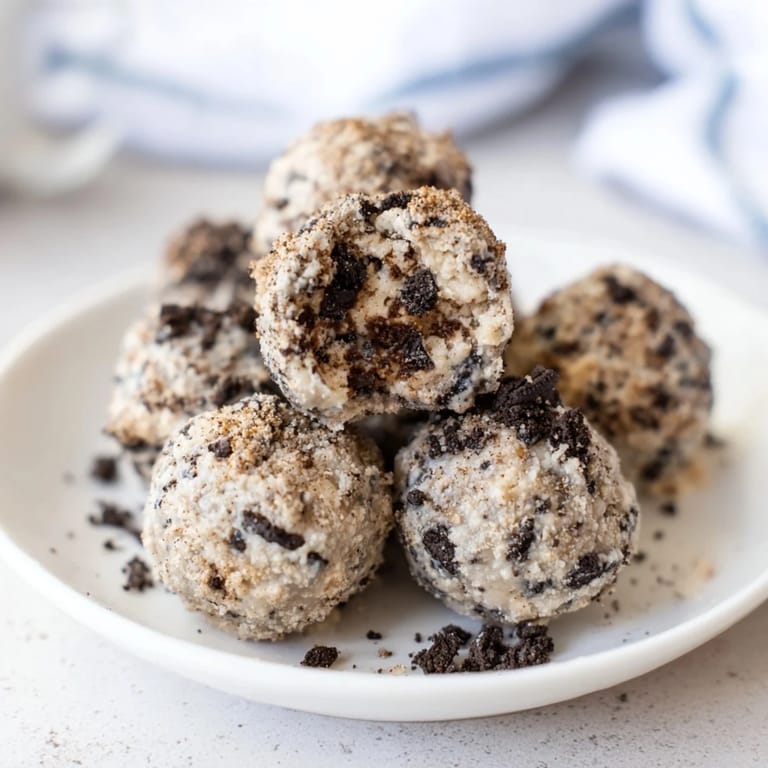
Cream Cheese Oreo Bites

Featured in: Snack Fun

These soft, chewy bites combine cream cheese and crushed Oreos for a dessert-like treat with an added protein boost. Blending softened cream cheese with cookie crumbs and protein powder creates a thick dough that's shaped into balls and chilled until firm. Optional mix-ins like chocolate chips or nuts enhance texture and flavor. Ideal for a quick snack or post-exercise energy, these no-bake bites offer a fudgy, cheesecake-like experience that stores well in the fridge or freezer.

Updated on Sun, 23 Nov 2025 16:54:00 GMT
Cream Cheese Oreo Protein Balls: creamy, Oreo-studded bites, perfect as a post-workout snack. Save
Cream Cheese Oreo Protein Balls: creamy, Oreo-studded bites, perfect as a post-workout snack. | grinnosh.com

Soft, chewy bites that taste like cookies and cream cheesecake with a serious protein boost No baking required perfect for a quick snack or post-workout treat

I first made these for my family and they couldn't get enough of the creamy texture paired with crunchy Oreo bits

Ingredients

  • Cream cheese: 8 oz (225 g), softened
  • Oreo cookies: 15-20, crushed
  • Protein powder: 1 cup (about 30 g), vanilla or cookies & cream flavor recommended
  • Milk: 2-3 tablespoons, dairy or plant-based
  • Vanilla extract: 1 teaspoon
  • Salt: Pinch
  • Optional add-ins: 1/3 cup chocolate chips, chopped nuts, or shredded coconut

Instructions

Step 1:
Place the Oreo cookies in a zip-top bag and crush them into fine crumbs using a rolling pin or food processor Reserve a few tablespoons for coating if desired
Step 2:
In a large mixing bowl combine the softened cream cheese with the crushed Oreos Mix until smooth and fully combined
Step 3:
Gradually add the protein powder stirring well to incorporate
Step 4:
Add 2 tablespoons of milk vanilla extract and a pinch of salt Mix until a thick dough forms Add an extra tablespoon of milk if the mixture feels too dry
Step 5:
Fold in chocolate chips nuts or coconut if using
Step 6:
Scoop out tablespoon-sized portions and roll into balls using your hands
Step 7:
Optional Roll the balls in reserved Oreo crumbs or shredded coconut for coating
Step 8:
Place the balls on a parchment-lined tray and refrigerate for at least 1 hour until firm
Step 9:
Serve chilled Store in an airtight container in the refrigerator for up to 5 days or freeze for up to 2 months
Enjoy these easy no-bake Cream Cheese Oreo Protein Balls, a delicious and healthy dessert. Save
Enjoy these easy no-bake Cream Cheese Oreo Protein Balls, a delicious and healthy dessert. | grinnosh.com

My kids love helping me roll the balls and we enjoy them together as an after-school snack

Required Tools

Mixing bowl Spoon or spatula Food processor or rolling pin (for crushing cookies) Measuring cups and spoons Baking tray or plate Parchment paper (optional)

Allergen Information

Contains Milk Wheat (gluten) Soy (from Oreos) and possibly tree nuts if using add-ins Check all ingredient labels if preparing for those with allergies

Nutritional Information

Calories 100 Total Fat 4 g Carbohydrates 10 g Protein 10 g per ball

These Cream Cheese Oreo Protein Balls have a rich cookies and cream flavor with added protein. Save
These Cream Cheese Oreo Protein Balls have a rich cookies and cream flavor with added protein. | grinnosh.com

These protein balls make a delicious and nutritious snack that can be enjoyed anytime

Recipe FAQ

Can I use a vegan cream cheese alternative?

Yes, substituting with dairy-free cream cheese and plant-based milk works well for a vegan option.

How do I crush the Oreo cookies effectively?

Use a food processor or place the cookies in a zip-top bag and crush with a rolling pin until finely ground.

Can I add other mix-ins to the balls?

Yes, chopped nuts, chocolate chips, or shredded coconut can be folded into the mixture for extra flavor and texture.

How long should the bites be chilled?

Chill the shaped balls in the refrigerator for at least one hour to firm up before serving.

What’s the best way to store these bites?

Keep them in an airtight container in the refrigerator for up to five days or freeze for up to two months.

Can I use different sandwich cookies instead of Oreos?

Absolutely, swapping Oreos for other sandwich cookies changes the flavor while maintaining texture.

Cream Cheese Oreo Bites

Chewy cream cheese and Oreo bites boosted with protein, ready in under 90 minutes without baking.

Prep duration
15 min
Cook duration
60 min
Complete duration
75 min
Created by Hannah Lewis

Type Snack Fun

Skill level Easy

Heritage American

Output 20 Portions

Dietary guidelines Meat-free

Components

Dairy & Alternatives

01 8 oz cream cheese, softened

Cookies

01 15–20 Oreo cookies, crushed

Protein

01 1 cup vanilla or cookies & cream protein powder (about 30 g)

Liquids & Flavorings

01 2–3 tablespoons milk (dairy or plant-based)
02 1 teaspoon vanilla extract

Seasoning & Optional Add-Ins

01 Pinch of salt
02 Optional: 1/3 cup chocolate chips, chopped nuts, or shredded coconut

Directions

Stage 01

Prepare Crushed Cookies: Place Oreo cookies in a zip-top bag and crush into fine crumbs using a rolling pin or food processor. Reserve a few tablespoons for coating if desired.

Stage 02

Combine Cream Cheese and Cookies: In a large mixing bowl, blend softened cream cheese with crushed Oreos until smooth and fully incorporated.

Stage 03

Incorporate Protein Powder: Gradually stir in protein powder until evenly combined.

Stage 04

Add Liquids and Seasoning: Mix in 2 tablespoons of milk, vanilla extract, and a pinch of salt until a thick dough forms. If too dry, add the remaining tablespoon of milk.

Stage 05

Fold in Optional Add-Ins: Gently fold in chocolate chips, nuts, or shredded coconut if using.

Stage 06

Form Balls: Scoop tablespoon-sized portions and roll into balls by hand.

Stage 07

Optional Coating: Roll the balls in reserved Oreo crumbs or shredded coconut for a decorative coating if desired.

Stage 08

Chill Until Firm: Arrange on a parchment-lined tray and refrigerate for at least 1 hour until set.

Stage 09

Serve and Store: Serve chilled. Store in an airtight container in the refrigerator for up to 5 days or freeze for up to 2 months.

Necessary tools

  • Mixing bowl
  • Spoon or spatula
  • Food processor or rolling pin
  • Measuring cups and spoons
  • Baking tray or plate
  • Parchment paper (optional)

Allergy details

Review each component for potential allergens and consult with healthcare professionals if you're uncertain about ingredients.
  • Contains milk, wheat (gluten), soy, and potentially tree nuts if included.

Nutrient content (per portion)

These values are approximate guidelines only and shouldn't replace professional nutritional advice.
  • Energy: 100
  • Fats: 4 g
  • Carbohydrates: 10 g
  • Proteins: 10 g