Save
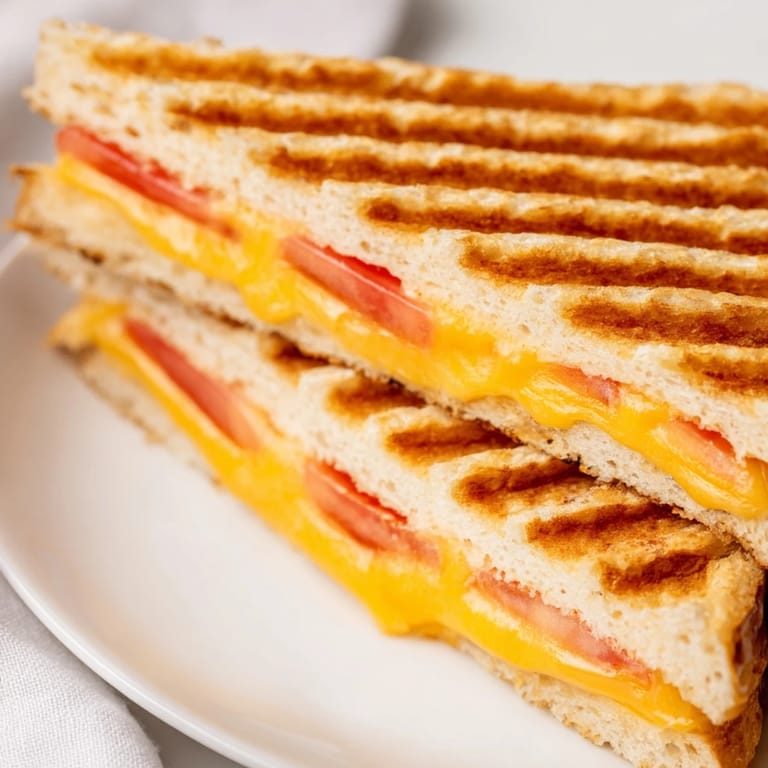
Save The waffle maker usually stays tucked behind the coffee maker, but one lazy Sunday morning I grabbed it on impulse and thought, why not toast a grilled cheese inside? The result was pure accident—butter sizzling between the ridges, cheese pooling into every honeycomb pocket, and a crunch so satisfying I wondered why I'd spent years making these the ordinary way. Now it's become my go-to when I want something that feels special without any real effort.
I made these for my roommate on a Tuesday night when she came home stressed about work, and watching her face light up at the golden, crispy exterior made me realize simple food can be exactly what someone needs. She ate two before I even finished the second one, asking how I'd never made them this way before.
Ingredients
- Bread: Four slices of your choice—white bread melts fastest and gets the crispiest, while sourdough holds up better if you like your cheese really gooey and want a tangier bite.
- Cheese: Cheddar is reliable, but Gruyère gets nutty and melts like silk, mozzarella stretches dramatically, and Swiss stays structured if you like seeing the cheese layers.
- Butter: Softened is essential—hard butter tears the bread and won't spread evenly for that crucial even browning and flavor.
- Tomato slices (optional): They add moisture and brightness, but pat them dry first or they'll make the sandwich soggy.
- Cooked bacon (optional): A few pieces add smokiness and richness that completely changes the whole thing.
- Dijon mustard (optional): A thin spread brings a subtle sharpness that makes the cheese taste more interesting.
Tired of Takeout? 🥡
Get 10 meals you can make faster than delivery arrives. Seriously.
One email. No spam. Unsubscribe anytime.
Instructions
- Heat your waffle maker:
- Turn it on and let it get fully hot—this usually takes 3-5 minutes, and you'll see a light change or hear a beep. A cold waffle maker means bread that steams instead of crisps.
- Butter your bread properly:
- Spread a thin, even layer on one side of each slice. The butter is what creates that golden crust and feeds the flavor, so don't skip it or skimp.
- Build your sandwiches:
- Place two buttered slices on your cutting board, butter side down. Add cheese to each, then any additions you're using, then top with the remaining bread slices, butter side up. The sandwich should feel a bit thick and generous.
- Press into the waffle maker:
- Set the sandwich on the hot grates and close the lid gently—don't slam it or cheese will squirt out the sides. A light press is enough; the weight of the lid does most of the work.
- Wait for the golden moment:
- This takes 3-5 minutes depending on your waffle maker's heat. You're looking for the bread to turn deep golden and hear it getting crispy, and you might smell the cheese starting to bubble at the edges.
- Repeat and rest:
- Remove the first sandwich carefully with tongs or a small spatula—the ridges make it a bit fragile—then cook the second one. Let them cool for exactly one minute before cutting or you'll burn your mouth.
 Save
Save My friend's five-year-old called these "fancy bread" and requested them for his lunch, which might be the best endorsement I've ever gotten. Somewhere between the crunch and the melted cheese and how fast they come together, they stopped being a guilty shortcut and became an actual meal I'm proud to serve.
Cheese Choices That Actually Matter
Not all melting cheese is created equal, and I learned this the hard way after buying expensive artisanal cheddar that refused to melt evenly. The best cheeses for this are ones that melt smooth without getting greasy—sharp cheddar, Gruyère, fontina, and even a good American cheese all work better than some fancy alternatives. If you go the fancy route, stick to one that's specifically made for melting, and feel free to mix two types for complexity.
Add-ins and Why They Work
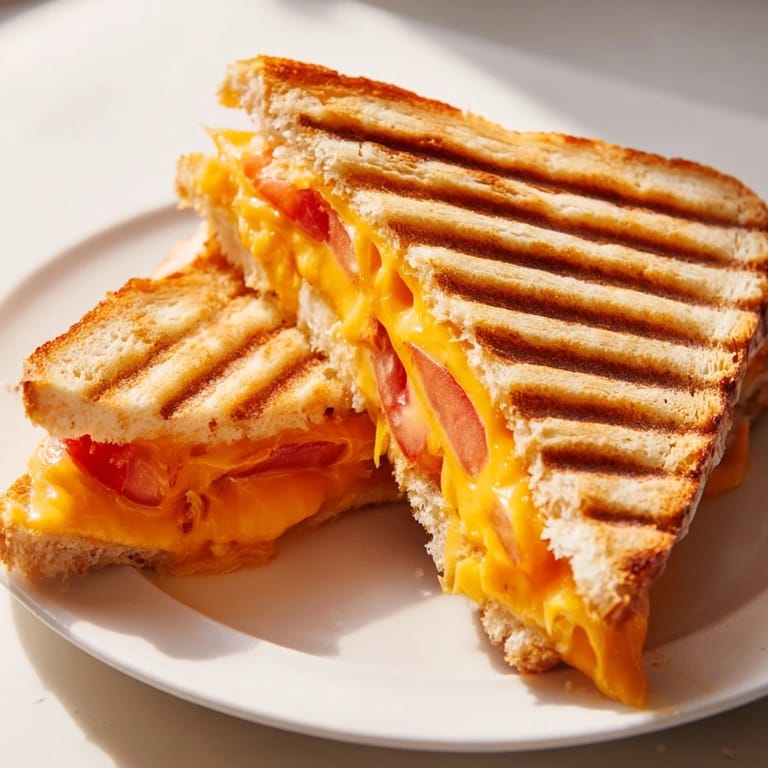
The tomato-cheese combo is classic for a reason, especially if you add a tiny pinch of salt to the tomato slice. Bacon adds smoke and salt that make the butter taste richer, while spinach brings earthiness and hides under the cheese so it doesn't compete. Caramelized onions take time but add a sweetness that softens any sharp cheese you use. The mustard trick is my favorite secret—just a thin stripe adds complexity without making anything taste obviously different.
- Pat tomato slices dry or the sandwich will steam instead of crisping.
- Cook your bacon ahead so you're not managing it while the sandwich is in the maker.
- Spread mustard so thin it's barely visible, or it can overpower everything else.
Serving and What Comes Next
These are best served immediately while the outside is still crispy and the inside is still molten. Tomato soup is the obvious pairing—the acidity cuts the richness of the cheese and butter perfectly—but a simple green salad or even a pickle spear on the side rounds everything out nicely. Reheating leftovers in the toaster or oven works better than microwaving, which turns the bread into rubber.
 Save
Save This is the kind of meal that tastes like you tried harder than you actually did, which might be its greatest gift. Five minutes and you have something that feels a little bit special, every single time.
Recipe FAQ
- → What breads work best for waffle grilled cheese?
Classic sandwich breads like white, whole wheat, or sourdough hold up well and develop a nice crisp texture.
- → Can I use different types of cheese?
Yes, cheeses that melt smoothly such as cheddar, Gruyère, mozzarella, or Swiss work perfectly for this preparation.
- → How long should I cook the sandwich in the waffle maker?
Press and cook for about 3 to 5 minutes until the bread is golden and crispy and the cheese is melted through.
- → Are there simple add-ins to enhance flavor?
Tomato slices, cooked bacon, or a touch of Dijon mustard can add extra flavor and texture to the sandwich.
- → What is the best way to butter the bread?
Use softened unsalted butter and spread a thin, even layer on the bread’s outer sides to ensure a rich, crispy crust.
- → Can this be made vegetarian?
Yes, by choosing vegetarian-friendly cheese and avoiding meat add-ins, it suits a vegetarian diet nicely.