 Save
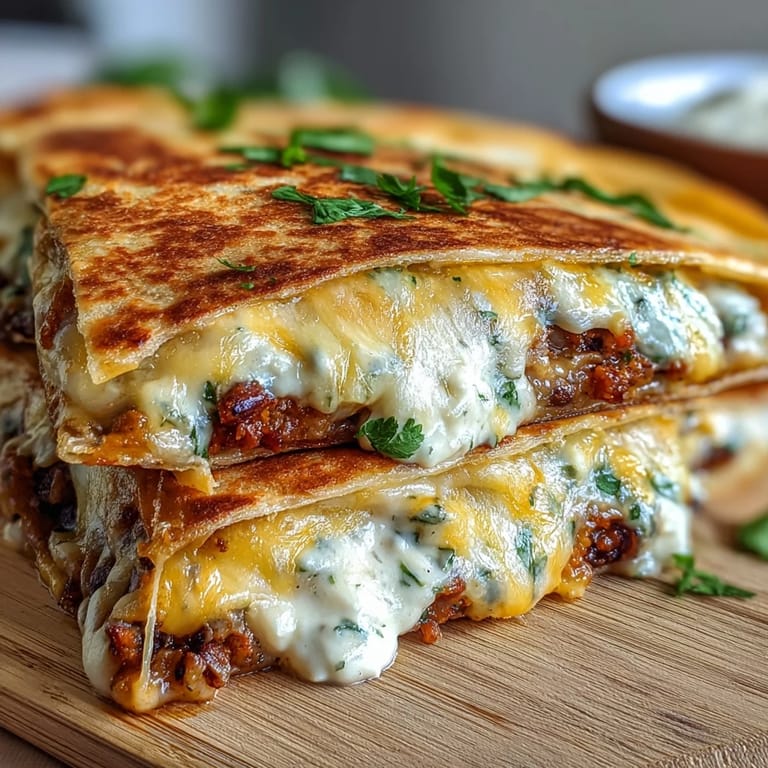
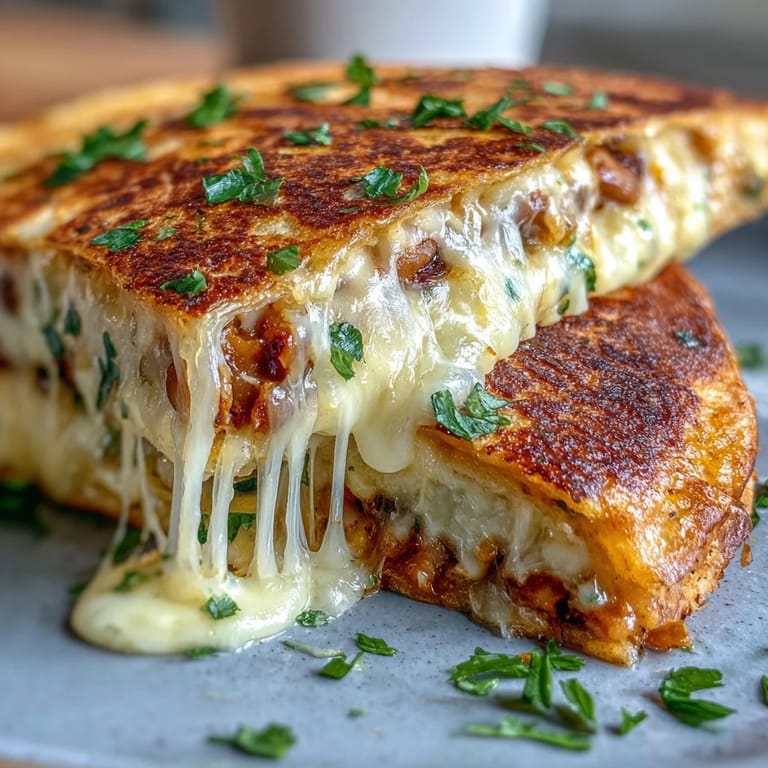
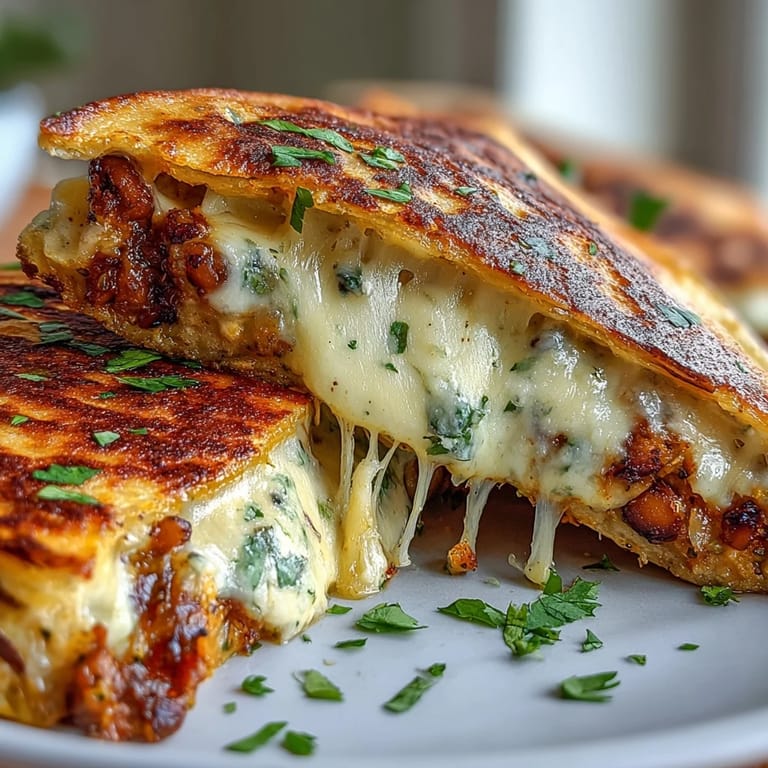
Save My neighbor handed me a container of black-eyed peas one afternoon, insisting I do something interesting with them beyond the usual side dish routine. That evening, standing in my kitchen with a half-empty pantry and a curious mood, I grabbed a tortilla and started layering. The result was so unexpectedly satisfying—crispy on the outside, creamy and seasoned on the inside—that I've made these quesadillas at least twice a month ever since. They're the kind of recipe that feels like a happy accident you keep repeating on purpose.
I made a batch for my book club last spring, thinking they'd be a casual appetizer. One member, who swears she doesn't eat vegetables, ate three wedges before realizing what they were, and we all laughed when she reached for a fourth. That's when I knew this recipe had something special—it sneaks past people's expectations and wins them over with flavor and texture.
Ingredients
- Black-eyed peas (1 1/2 cups cooked): Canned works perfectly fine, just rinse them well to reduce sodium and cloudiness in your filling.
- Olive oil (1 tablespoon) and butter or neutral oil (2 tablespoons): Olive oil flavors the filling gently, while butter in the skillet creates that golden, crispy tortilla exterior you're after.
- Onion (1/2 small) and garlic (1 clove): These two together build the flavor foundation—don't skip the sautéing step, as it mellows them and makes everything taste cohesive.
- Ground cumin (1/2 teaspoon) and smoked paprika (1/4 teaspoon): This spice pairing gives warmth and a subtle smokiness without overpowering the delicate pea flavor.
- Lime juice (1 tablespoon): Brightens everything at the last moment and prevents the filling from tasting flat.
- Fresh cilantro (1/4 cup, optional): I use it almost always because it adds a fresh note that cuts through the richness of melted cheese.
- Flour tortillas (8 medium, 8-inch): Room temperature tortillas fold easier and cook more evenly than cold ones straight from the fridge.
- Cheddar or Monterey Jack cheese (1 1/2 cups shredded): Both melt beautifully and add a pleasant tang; shredding fresh cheese yourself ensures better melting than pre-shredded varieties.
Tired of Takeout? 🥡
Get 10 meals you can make faster than delivery arrives. Seriously.
One email. No spam. Unsubscribe anytime.
Instructions
- Build your aromatic base:
- Warm olive oil in a skillet over medium heat, then add diced onion and let it soften for 3 to 4 minutes until the edges turn translucent and the smell fills your kitchen. Add minced garlic and cook just until fragrant, about 1 minute—this prevents it from burning and getting bitter.
- Warm and season the peas:
- Stir in the black-eyed peas, cumin, smoked paprika, salt, and pepper, cooking for 2 to 3 minutes until everything is heated through and the spices bloom. You'll notice the mixture smells toasty and warm when it's ready.
- Mash with intention:
- Remove from heat and use a potato masher or fork to crush the peas coarsely, leaving some whole pieces for texture rather than making a smooth puree. Stir in lime juice and cilantro, then taste and adjust seasoning if needed.
- Assemble with balance:
- Lay out 4 tortillas and divide the mashed pea mixture evenly across half of each one, then sprinkle cheese over the filling. Fold each tortilla in half gently but firmly so nothing falls out during cooking.
- Crisp to golden brown:
- Heat 1/2 tablespoon of butter or oil in your skillet over medium heat and cook one or two quesadillas at a time for 2 to 3 minutes per side, until the tortilla is crispy and golden and the cheese visibly melts inside. Add a touch more butter between batches if the pan looks dry.
- Slice and serve:
- Transfer to a cutting board and slice each quesadilla into three or four wedges while still warm, then serve with salsa, sour cream, or guacamole.
 Save
Save There's a quiet comfort in watching someone bite into something you made and seeing their eyes light up because the flavors work, the textures balance, and it tastes like care. That's what these quesadillas do, every single time.
When Texture Matters Most
The mashing step is where people either nail this recipe or wish they had. Leaving the peas partially chunky creates pockets of whole beans that burst with flavor, whereas mashing them into a smooth paste makes the filling dense and one-note. I learned this the hard way by over-mashing on my third attempt, so now I aim for that middle ground where you can see individual peas mixed with creamy bits.
Make It Your Own
The base recipe is flexible enough to welcome your preferences without falling apart. Sautéed bell peppers or jalapeños add color and flavor without changing the cooking method, and switching to corn or whole wheat tortillas gives you a different character while keeping the filling exactly the same. I've even made a batch with cotija cheese instead of cheddar when I was in an experimental mood, and it worked beautifully.
Serving and Storage Wisdom
These taste best eaten hot or warm, when the cheese is still soft and the tortilla still has some give, but they reheat reasonably well in a dry skillet over low heat if you have leftovers. Store cooled quesadillas in an airtight container in the refrigerator for up to three days, though they're honestly better eaten the same day.
- Warm the filling slightly before assembling if you're cooking the next day, so the cheese melts more evenly in the skillet.
- Have all your ingredients prepped and within arm's reach before you start cooking—the whole process moves quickly once you begin.
- If your tortillas are cold, wrap them in a damp paper towel and microwave for 15 seconds to make them pliable and easier to fold.
 Save
Save This recipe proves that sometimes the best meals come from curiosity and a few good ingredients working together. Make them when you want something warm, filling, and ready faster than you'd expect.
Recipe FAQ
- → Can I use dried black-eyed peas instead of canned?
Yes, soak and cook dried black-eyed peas according to package directions until tender before using. One can equals about 1½ cups cooked peas.
- → What cheese works best for these quesadillas?
Cheddar and Monterey Jack melt beautifully and offer great flavor. You can also use pepper jack for heat, Mexican blend, or dairy-free alternatives.
- → How do I store and reheat leftovers?
Refrigerate cooled quesadillas in an airtight container for up to 3 days. Reheat in a dry skillet over medium heat or in a 350°F oven until warmed through and crispy.
- → Can I make these gluten-free?
Absolutely. Use certified gluten-free corn or flour tortillas and check that your cheese and other ingredients are gluten-free.
- → What toppings pair well with these quesadillas?
Fresh salsa, guacamole, sour cream, sliced avocado, pickled jalapeños, or a dollop of Greek yogurt all complement the flavors beautifully.
- → Can I freeze uncooked quesadillas?
Yes, assemble the quesadillas and wrap individually in plastic wrap, then foil. Freeze for up to 2 months. Cook from frozen, adding a few extra minutes per side.