 Save
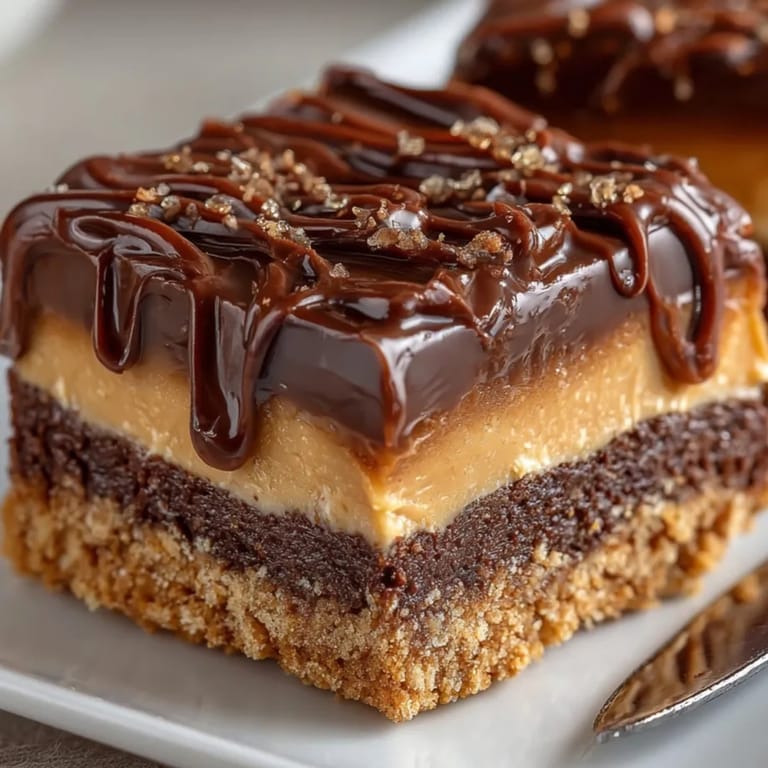
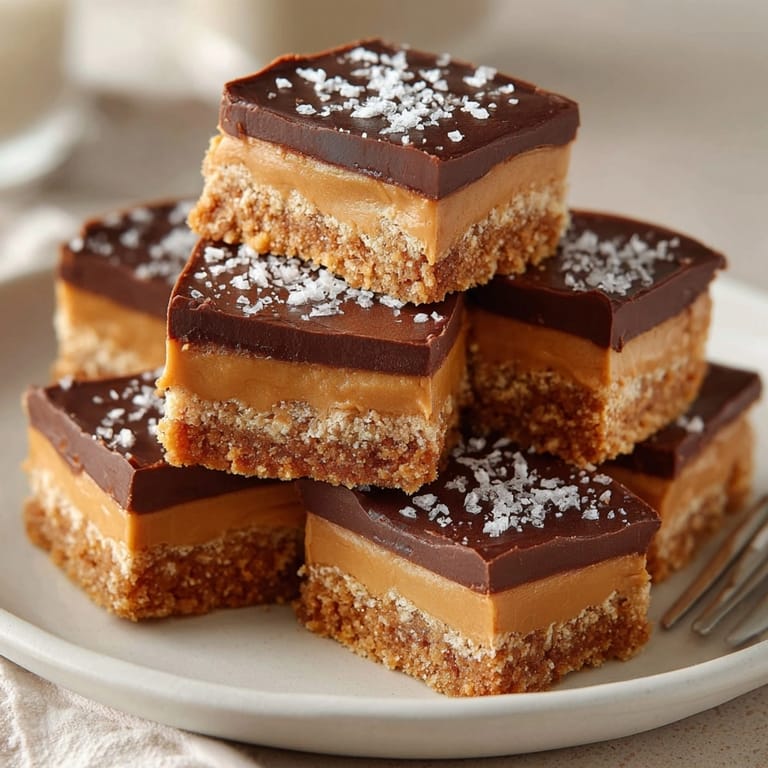
Save These peanut butter chocolate bars are my ultimate go-to when I need something easy yet impressive for parties or those days when the chocolate craving hits hard. With a rich, chewy peanut butter layer and a glossy chocolate finish, they come together quickly and disappear just as fast.
Even on my busiest evenings, I can make these bars and know they will be the first dessert to vanish. My family insists they taste like a homemade version of their favorite peanut butter cups.
Ingredients
- Creamy peanut butter: The heart of both layers Use a fresh jar for the smoothest results and rich nutty flavor
- Unsalted butter: Adds moisture and rich flavor Look for butter with no added salt for best results
- Graham cracker crumbs: Provide structure and a hint of toasty taste Choose crisp, fresh crackers and crush finely for a firm base
- Powdered sugar: Sweetens and binds the base Check for lumps and sift if needed for a silky mixture
- Semi-sweet chocolate chips: Create that classic chocolate topping Go for quality chips for an extra indulgent finish
- Optional chopped roasted peanuts: Sprinkle in for crunch Toast them lightly before adding for even more flavor
Tired of Takeout? 🥡
Get 10 meals you can make faster than delivery arrives. Seriously.
One email. No spam. Unsubscribe anytime.
Instructions
- Prepare the Pan:
- Line an eight-inch baking pan with parchment paper allowing extra paper to hang over the sides for easy lifting later Press the paper into the corners to avoid sticking
- Mix the Base:
- In a large mixing bowl combine the full cup of creamy peanut butter melted unsalted butter crushed graham crackers and powdered sugar Stir thoroughly until fully blended The mixture should be thick but spreadable
- Press the Base:
- Transfer the peanut butter mixture into the prepared pan Use a spatula or clean hands to press it down firmly Create an even compact layer by smoothing the top thoroughly This ensures the bars hold together once cut
- Melt the Chocolate Topping:
- Add the chocolate chips and a quarter cup of creamy peanut butter to a microwave-safe bowl Heat in thirty second bursts stirring after each until fully melted and smooth This may take about one to two minutes total Be careful not to overheat as chocolate melts quickly
- Spread the Topping:
- Immediately pour the melted chocolate mixture over the base Use a spatula to spread it right to the edges If you want a glossy finish tap the pan gently on the counter to smooth out the top
- Chill the Bars:
- Place the pan in the refrigerator for at least forty minutes Waiting allows the chocolate top to set fully so your bars slice cleanly
- Slice and Serve:
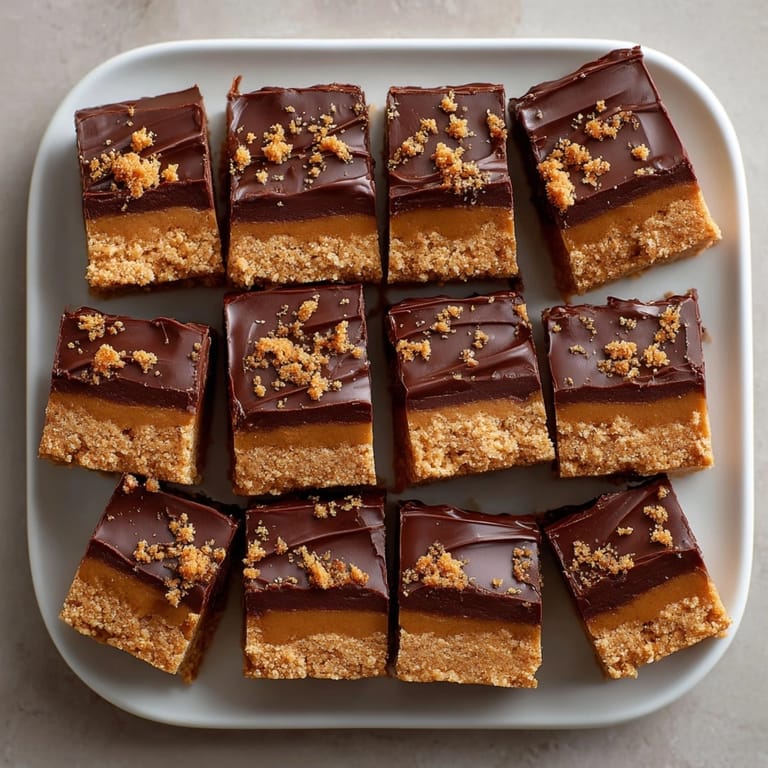
- Once the chocolate is set use the parchment paper to lift the bars onto a cutting board Cut carefully into sixteen even squares with a sharp knife For perfect edges warm the knife under hot water and wipe dry between cuts
- Serving Temperature:
- Enjoy the bars chilled for a firmer bite or at room temperature for a softer chewy texture
 Save
Save My personal favorite touch is using crunchy peanut butter for a bit of texture Sometimes my kids jump in to help with stirring the base and I always end up with sticky fingers and laughter in the kitchen These bars have become our no-fuss birthday tradition every year
Storage Tips
Keep any leftovers tightly covered in the fridge for up to a week To prevent the chocolate from sticking use a sheet of parchment between layers if stacking in a container If you want to freeze them wrap each bar individually with plastic wrap and store in a freezer-safe bag They can be enjoyed straight from the freezer or thawed for about ten minutes
Ingredient Substitutions
For a vegan option replace the butter and chocolate chips with dairy-free alternatives If you run out of graham crackers digestive biscuits work well and can even add a slightly maltier taste If you do not have powdered sugar pulse granulated sugar in the blender until fine and light
Serving Suggestions
Cut the bars into tiny squares for a sweet bite at parties or into larger rectangles for bake sales I like to serve them after a casual dinner for a simple yet luxurious dessert Try topping each square with a sprinkle of flaky sea salt
A Sweet Piece of Americana
These bars borrow flavors from classic American candies and old-fashioned bake sale staples Their roots are in the simple joys of childhood kitchen experiments The no-bake base and chocolate-peanut combo have been a staple in my family since the eighties
Seasonal Adaptations
Add a pinch of cinnamon to the base in fall for warmth Swap peanut butter for almond or sunflower seed butter in spring for a lighter taste Sprinkle crushed peppermint candies on the chocolate topping in winter for a festive twist
Success Stories
Every potluck I bring these to someone asks for the recipe My neighbor made them for her son’s birthday and told me not a single crumb was left At friendsgiving one year I doubled the batch and there were still no leftovers
Freezer Meal Conversion
These bars freeze beautifully Wrap them well and tuck away for later For best results let them chill completely before slicing then freeze in a single layer Once solid stack with parchment in between and store for up to three months Simply defrost at room temperature before serving
 Save
Save These peanut butter chocolate bars are a delightful treat that satisfies cravings and impresses guests with minimal effort. Their rich flavor and chewy texture make them a crowd-pleaser for any occasion.
Recipe FAQ
- → What type of peanut butter works best?
Creamy peanut butter provides a smooth texture, but crunchy can add extra texture if preferred.
- → Can I use a different base instead of graham crackers?
Yes, digestive biscuits or gluten-free alternatives are great choices for the crust layer.
- → How do I store the bars?
Keep in an airtight container in the fridge for up to one week, or freeze for longer storage.
- → Are these bars suitable for a vegan diet?
Substitute dairy butter and chocolate chips with plant-based alternatives for a vegan-friendly option.
- → How can I add crunch to the bars?
Stir in chopped roasted peanuts or use crunchy peanut butter in the base for extra texture.