 Save
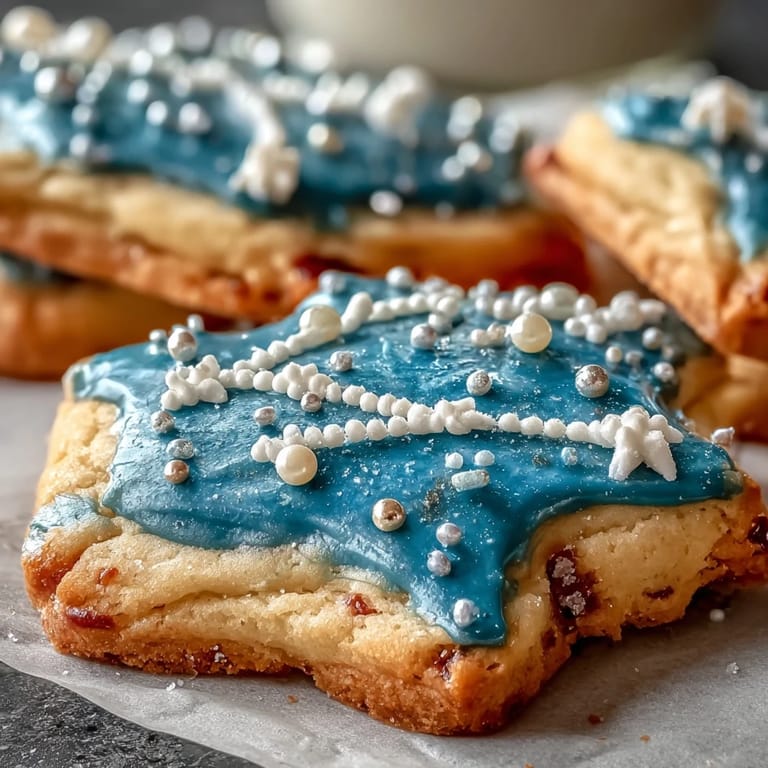
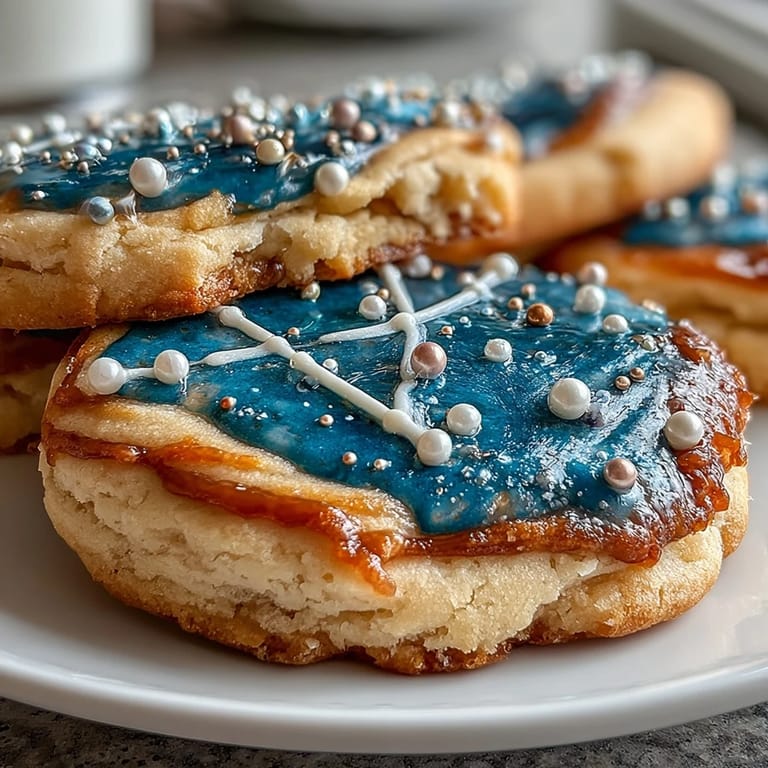
Save Last winter, my niece asked why the stars looked different every month, and I realized I couldn't explain the constellations half as well as I could show them to her through food. These Pisces constellation sugar cookies became our kitchen project that turned into something magical—delicate butter cookies transformed into edible star maps with swirls of royal icing and tiny pearls catching the light. What started as a way to teach her about astrology became a tradition where we'd pipe constellations together, her small hands steadying the piping bag while I guided the tiny dots and lines that suddenly made the night sky make sense on a plate.
I brought a batch to a book club that was deep in a discussion about mythology, and watching everyone pause mid-sentence to examine the constellation piping, then actually taste them, felt like I'd given them permission to be delighted by small beautiful things. Someone asked if they were too pretty to eat, and I said that was exactly the point—they exist in that space where edible art makes people happy twice over.
Ingredients
- All-purpose flour (2 1/2 cups): The foundation that keeps these cookies tender without being cakey; I've learned that measuring by weight gives you consistency that scooping never does.
- Baking powder (1/2 teaspoon): Just enough lift to keep them delicate rather than dense, but not so much that they puff unpredictably in the oven.
- Salt (1/4 teaspoon): Brings out the vanilla and butter complexity that makes people ask if there's something secret in these.
- Unsalted butter (3/4 cup, softened): Room temperature butter creams properly with sugar, and unsalted lets you control the seasoning entirely.
- Granulated sugar (1 cup): Creates the crispy edges and tender centers that make each bite interesting.
- Egg (1 large): Binds everything while keeping the texture delicate enough that the icing sits beautifully without cracking the cookie underneath.
- Vanilla extract (2 teaspoons): Pure vanilla matters here because the cookie is simple enough that cheap extract will taste like cheap extract.
- Powdered sugar (2 cups, sifted): Lumpy powdered sugar makes your icing streaky, so I learned to always sift it first, even though it feels like an extra step.
- Meringue powder (2 tablespoons): Creates royal icing that hardens smooth and crisp; without it you get something that never quite dries right.
- Water (3-4 tablespoons): The amount depends on humidity and how thick you want your icing, so add it slowly and adjust as you go.
- Gel food coloring: Gel doesn't thin your icing like liquid coloring does, which means deeper navy blues and silvers that actually look like night sky.
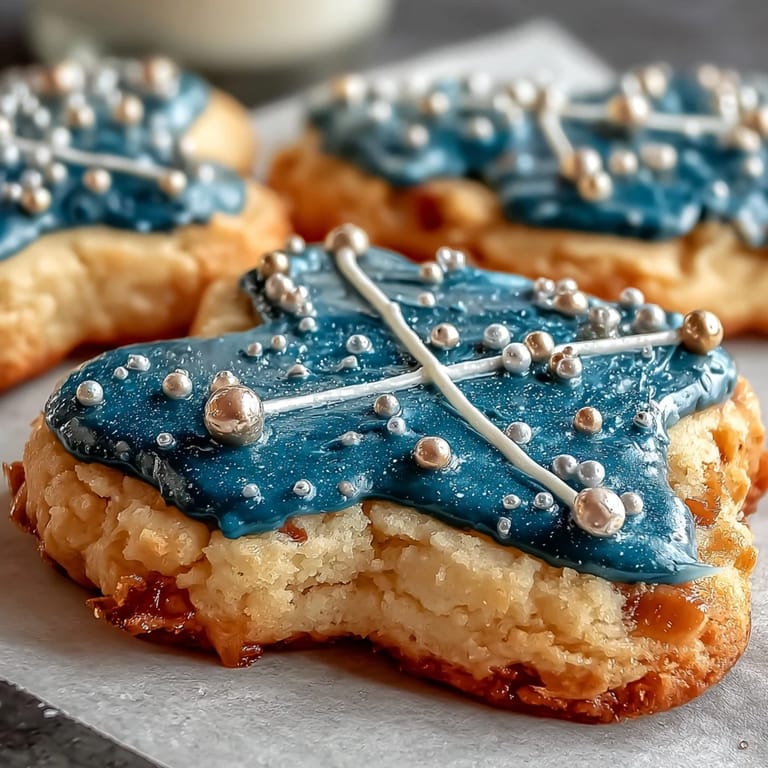
- Edible pearls or stars: These catch light and give the cookies that tiny luxury feel that makes people linger over eating them.
Tired of Takeout? 🥡
Get 10 meals you can make faster than delivery arrives. Seriously.
One email. No spam. Unsubscribe anytime.
Instructions
- Bring your butter to room temperature:
- Cold butter won't cream properly, and you'll end up with grainy dough that doesn't hold the delicate texture these cookies need. Leave it on the counter while you gather everything else.
- Whisk your dry ingredients together:
- Mixing the flour, baking powder, and salt separately ensures the leavening distributes evenly so every cookie bakes the same way. This is worth the extra bowl, I promise.
- Cream butter and sugar until it's pale and fluffy:
- This takes about 2 to 3 minutes with an electric mixer, and you'll see it transform from grainy to almost cloud-like. This step incorporates air that keeps the cookies tender.
- Beat in your egg and vanilla:
- Add these slowly so they fully incorporate rather than sitting on top of the butter mixture like they're afraid to join. You want everything homogeneous and smooth.
- Fold in the dry ingredients gently:
- Stop mixing as soon as you don't see flour streaks anymore; overworking develops gluten that makes cookies tough instead of tender. This is where patience actually pays off.
- Chill your dough properly:
- At least one hour in the fridge, and honestly, overnight is even better because cold dough is easier to cut out and bakes more evenly. I usually prepare it the evening before decorating day.
- Roll and cut your cookies:
- Let your dough sit at room temperature for just 5 minutes before rolling so it's not rock hard, and keep a light flour duster nearby. Circles work beautifully for star charts, but you can use any shape.
- Bake until edges just turn golden:
- Watch for that first hint of color around the edges at the 8-minute mark; they'll continue baking slightly after you remove them, and overbaked cookies taste dry no matter how beautiful they look. They should be barely firm in the center when warm.
- Cool completely before icing:
- Warm cookies will melt your royal icing, which sounds like it might be dramatic but it actually just creates a sad runny mess. Wire racks let air circulate underneath so they cool evenly.
- Prepare your royal icing:
- Sift your powdered sugar first, then whisk it with meringue powder before slowly adding water while stirring. Add water one tablespoon at a time until you reach stiff peaks that hold their shape.
- Divide and tint your icing:
- Use gel coloring for that deep navy blue that actually looks like night sky, and keep some white for the constellation lines and stars. A little coloring goes further than you'd think, so start with a toothpick dab.
- Frost your cooled cookies:
- A thin layer of blue icing covers the whole cookie and creates your sky; let it set for about 15 minutes so your white icing doesn't drag through it when you pipe. This waiting moment is when I usually have tea and admire what I've done so far.
- Pipe your constellation:
- Using white icing in a fine-tip piping bag, connect the stars of Pisces with delicate lines, then dot each star point. If you mess up, a toothpick can gently smooth errors before the icing fully sets.
- Add your edible pearls while icing is still wet:
- They'll stick to soft icing but won't adhere to dried icing, so timing matters here. Press them gently at each star point, and add any gold or silver accents while you're at it.
- Let everything dry completely:
- Give it at least 4 hours or overnight before stacking or serving so the icing hardens properly. They'll keep in an airtight container for about a week, and they're actually nicer the next day when the cookie has softened slightly against the crisp icing.
 Save
Save There was something quietly moving about watching my niece pipe her first constellation completely on her own, leaning so close to the cookie she could barely see it, completely absorbed in connecting tiny dots into something that meant something. She asked if we could make cookies for all her friends with their own zodiac signs, and suddenly I understood why people bake—it's not really about the cookies at all, it's about creating reasons to sit down together and make something small and deliberate.
The Science Behind the Tender Crumb
These cookies walk a careful line between crispy edges and tender centers, which happens because of how butter distributes throughout the dough. When you cream butter and sugar, you're incorporating tiny air bubbles that create lift during baking, giving you that delicate texture. The egg acts as a binder without making things tough, and vanilla adds complexity that plain sugar cookies never have. I learned this the hard way by trying to rush the creaming step, which produced cookies that were more like shortbread than what these are meant to be.
Why Royal Icing Matters for This Project
Royal icing hardens smooth and crisp, which is exactly what you need when you're trying to create defined constellation lines on something round and delicate. Regular frosting would be too soft and would smudge when you tried to pipe detailed work, and it would never hold the shape of tiny stars. The meringue powder creates the structure that makes everything possible, so it's not an optional ingredient even though store-bought icing can work in a pinch. I've tried shortcuts, and while they occasionally work, the real icing is what gives these cookies their finished, almost porcelain-like quality.
Making This Recipe Your Own
Once you master the basic cookie and icing technique, you have unlimited constellation options, which means you can create personalized cookies for birthdays, star-lover friends, or themed parties. Some people use different colors entirely—I've seen these done in purples and golds, silvers and deep blues, whatever matches your vision. The edible pearls and accents are where you can really express yourself; some people use nonpareils, others use tiny luster dust, and I've seen someone use edible flowers pressed into wet icing for something completely unexpected. The constellation itself becomes the place where your creativity lives.
- Map out your constellation in pencil on parchment first so you have a guide to follow while piping, especially if you're doing a complicated one.
- Use a turntable if you have one; rotating the cookie while you pipe keeps your hand steadier and your lines more even.
- If your piping bag clogged mid-star, a toothpick gently poked through the tip usually solves it without having to start over.
 Save
Save These cookies exist in that rare space where something can be beautiful enough to almost feel too lovely to eat, but delicious enough that you do anyway and don't regret it. They're the kind of recipe that reminds you why people have baked for centuries—not for the calories, but for the permission to make something deliberately small and lovely.
Recipe FAQ
- → What ingredients are essential for the cookie dough?
Basic ingredients include all-purpose flour, baking powder, salt, unsalted butter, granulated sugar, egg, and vanilla extract, resulting in soft, flavorful cookies.
- → How do I achieve the royal icing consistency?
Whisk powdered sugar, meringue powder, and water until stiff peaks form; add water carefully to adjust thickness for piping or flooding.
- → What is the best way to decorate the constellation details?
Use navy blue icing for the background and white icing to pipe constellation lines and stars, adding edible pearls for star tips to enhance detail.
- → Can I prepare the dough ahead of time?
Yes, the dough should be chilled for at least one hour to improve its texture and make rolling easier.
- → Are there alternative decorations for the stars?
Edible gold or silver pearls are traditional, but white nonpareils or gold dragees can also provide elegant accents.