 Save
Save The afternoon I first tried fermenting my own hot sauce, the whole kitchen seemed saturated with the sharp, addictive perfume of chilies and garlic. Windows cracked, I remember the quiet fizz that followed days later, a telltale sign my jar was alive and brewing complexity. A splash of the fiery, tangy liquid tasted both new and somehow inevitable, like it was meant to end up on everything from eggs to tacos. Experimenting with fermentation started as a just-for-fun project, but the process lured me in more than I expected. There’s something oddly calming in watching those bubbling jars shift color and scent over a week.
Last summer, a friend stopped over just as I was bottling my first batch—she recoiled from the pungent aroma at first, then demanded the recipe once she tasted what a little patience could do. We laughed about my nervous note-taking and shared way too many chips dunked in fresh hot sauce. Only a few weeks later, I was fielding messages from everyone who’d gotten a small jar. The feedback? Please make more. That’s how this sauce turned into a staple in my fridge—and everyone else’s who left my kitchen that day.
Ingredients
- Fresh Red Chili Peppers (300 g): Use a vibrant mix of medium-heat chilies, and wear gloves when handling if you’re sensitive—the fresher, the better for a lively tasting sauce.
- Red Bell Pepper (1 small): It tones down the heat just enough to let more subtle flavors through and adds volume that helps the fermentation along.
- Garlic Cloves (4): Always go for fresh, plump cloves—they mellow and become tangy-sweet over the week.
- Shallot or Onion (1 small or 1/2 small onion): These aromatics add a savory backbone—you can swap for what’s on hand.
- Carrot (1 medium, optional): Sliced carrot adds subtle sweetness and body; I like it for the silkier texture it brings to the finished sauce.
- Filtered Water (500 ml): Unfiltered or chlorinated water can inhibit fermentation, so use the cleanest water you can.
- Non-Iodized Salt (15 g/1 tbsp): Sea salt or kosher only—skip anything with anti-caking agents to let your microbes thrive.
- Apple Cider or Distilled White Vinegar (2 tbsp): This gives that tart backbone and helps round out the finished flavor.
Tired of Takeout? 🥡
Get 10 meals you can make faster than delivery arrives. Seriously.
One email. No spam. Unsubscribe anytime.
Instructions
- Mix the Brine:
- In a bowl, dissolve the salt fully in the filtered water until barely cloudy—you want it to taste like a gentle ocean.
- Chop the Vegetables:
- Slice your chilies, bell pepper, carrot, garlic, and onion up roughly; the air fills with heat and sweetness as you go.
- Layer Everything in the Jar:
- Pack the chopped veggies snugly into a spotless 1-liter glass jar, pressing them down just enough to fit but not jam together.
- Add the Brine:
- Pour the brine over all the vegetables, making sure every piece is covered, then gently tuck in a fermentation weight or use a bag filled with extra brine.
- Cover Loosely:
- Secure the lid just barely tight, or pop on your airlock—let the gases escape while keeping unwanted guests (and odors) in check.
- Ferment in a Cool Spot:
- Find a dark, steady place in your kitchen (like a cabinet) and let the magic happen for 7 days, peeking in each day to skim any foam and make sure nothing pokes above the brine.
- Blend the Sauce:
- Everything goes into the blender—veggies, brine, vinegar—and blend until smooth with the lid held down firmly, trust me.
- Strain or Not:
- If you crave a silky finish, pass the mixture through a fine mesh sieve; otherwise, keep it rustic and robust.
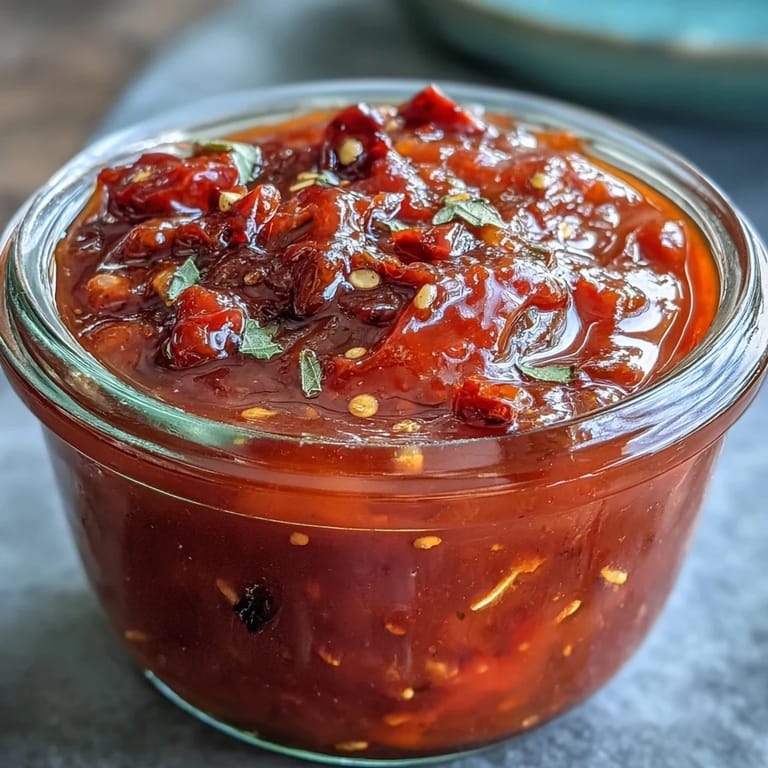
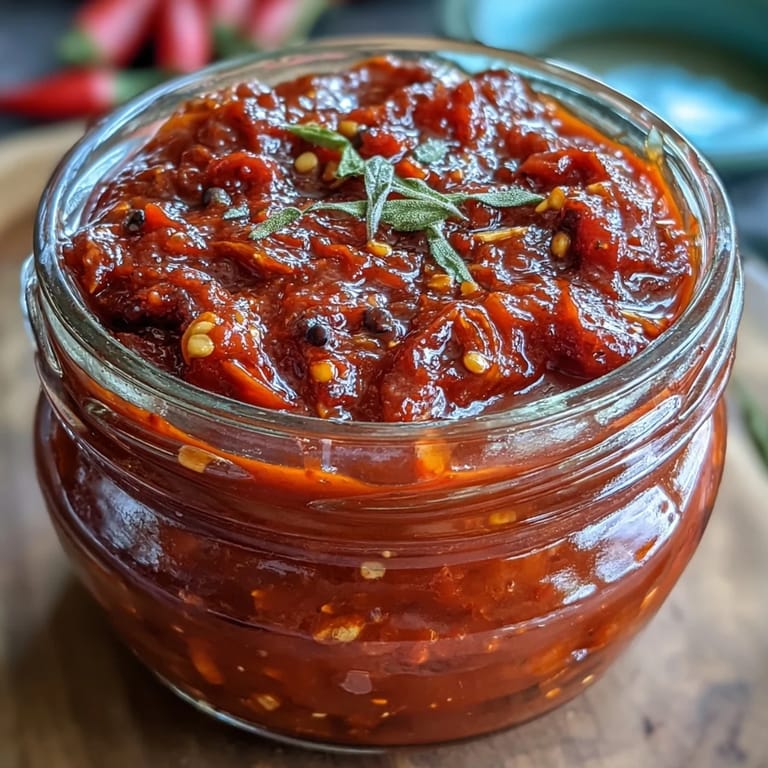
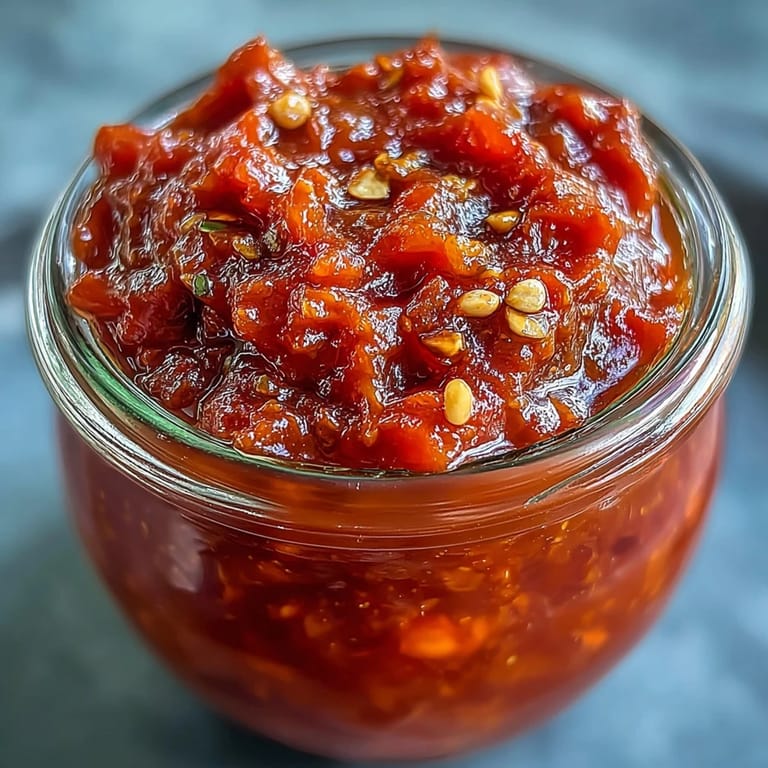
- Bottle Up:
- Decant into a scrupulously clean bottle or jar, cool it down in the fridge, and admire your handiwork (it’ll keep evolving in flavor for months).
 Save
Save A while back, a close friend came over with takeout tacos and we opened a fresh bottle together—the first dash was bright and wild, and the table fell silent except for crunching and little whoops over the heat. In that moment, my simple hobby turned into something I couldn’t wait to share for years to come.
Fermentation in Real Life
Every batch is a bit different, depending on the peppers you choose and the temperature in your kitchen—sometimes you’ll see tiny bubbles racing up the side or colors deepening in unexpected ways. Trust your nose: if it smells sour and chili-ish, you’re on the right track. It’s actually pretty forgiving, so try not to stress if you forget it for a day or two as long as it stays submerged.
Customizing the Heat and Flavor
Playing with pepper combinations is half the fun—I’ve tossed in a stray habanero here, a few Thai chilies there, or swapped vinegars when I wanted something milder. Even seeds and skins left in or blended smooth impact the flavor and level of punch. Don’t be afraid to slip in a few spices, like coriander or black peppercorns, for jazzy complexity.
Bottling and Storing Your Masterpiece
Let the sauce cool after blending before bottling, as this will prevent steam from warping your containers and also helps the flavors settle. Make sure your bottle is squeaky clean—a tiny bit of leftover soap or unsterilized glass can undo a week’s careful work. The hardest part is letting it mellow in the fridge (a week more and wow); patience will reward you with evolving taste.
- Use a funnel for less mess as you transfer the hot sauce into bottles.
- Label the date—trust me, you’ll lose track once you start fermenting regularly.
- Always shake before serving, as natural separation is totally normal.
 Save
Save I hope this homemade hot sauce brings as much adventure and discovery to your kitchen as it’s brought to mine. There’s no better feeling than sharing a bottle that captures a week’s worth of careful, spicy anticipation.
Recipe FAQ
- → How long should the peppers ferment?
Ferment the jarred vegetables for 7 days at a steady 18-22°C. Shorter times yield brighter, less developed tang; longer fermentation deepens acidity and complexity.
- → How do I keep the vegetables submerged?
Use a fermentation weight or a small zip-top bag filled with brine to press the vegetables under the liquid. Regularly check and skim any surface scum to prevent off-flavors.
- → Can I adjust the heat level?
Yes. Swap in hotter chilies like habanero or Thai chilies for more heat, or include fewer seeds and milder varieties like Fresno or red bell pepper to tame the spice.
- → Should I strain the blended sauce?
Straining through a fine-mesh sieve yields a smooth, pourable sauce. Leaving it unstrained gives a rustic texture with more body and visible flecks of pepper and seeds.
- → How long does the finished sauce keep?
Once blended and bottled, store the sauce in the refrigerator for up to 3 months. Flavors will continue to mellow and develop over that time.
- → What flavor adjustments work well?
Add spices like crushed peppercorns, coriander seeds or a splash of rice or apple cider vinegar to tweak brightness and complexity. A small amount of carrot adds natural sweetness and body.